Category: Preparedness Guides

Practical guides for off-grid power, water filtration, first aid, communication, and 72-hour readiness planning.

  • What to Prepare Before War or Regional Conflict Disrupts Daily Life: A Civilian Supply Plan

    What to Prepare Before War or Regional Conflict Disrupts Daily Life: A Civilian Supply Plan

    civilian supply plan before war or regional conflict disrupts daily life hero image

    Reference framework: This guide adapts public planning principles from Ready.gov’s kit, shelter, and evacuation guidance, the Red Cross family planning model, and the UK government’s Prepare campaign. It is written for civilian continuity and safe household preparation, not tactical action.

    What this guide covers

    1. How to set civilian priorities before shortages or movement restrictions begin
    2. Which supplies matter most for water, medicine, communication, warmth, and sanitation
    3. How to buy and store in layers without panic buying or wasting money
    4. Which current CampEssentials products can support the plan without overbuilding it

    Start with a civilian order of priority

    When people hear the word war, many jump straight to dramatic ideas: escape bags, hard gear, or scenarios that are unlikely to match their real life. Public preparedness guidance is more grounded than that. The first job is to protect the systems that most homes lose first: clean water confidence, medicine access, communications, backup light, safe warmth, and documents that make relocation or assistance easier.

    That means your first purchases should support continuity instead of spectacle. If your home cannot cover a few days of drinking water, charge phones and radios reliably, locate medicines in seconds, or manage warmth in an unheated room, the gap is not advanced equipment. The gap is basic infrastructure inside your own household.

    Build a three-layer supply plan

    A strong civilian shelf usually grows in three layers. Layer one covers the first 72 hours, because that is where confusion and delay create the fastest pressure. Layer two extends into a fuller household buffer, which matters when resupply, movement, or utility restoration takes longer than expected. Layer three is what you add only after the basics are stable: redundancy, comfort, and better organization.

    System Start here first Upgrade only after the base layer is in place
    Water Stored drinking water, one dependable filter, cups, labeling, refill routine Additional containers, gravity filtration, backup treatment tablets, cleaner rotation storage
    Food Shelf-stable items the household already tolerates, manual opener, simple utensils Longer-duration food buckets, improved cooking support, rotation notes by person
    Medicines Current prescriptions, dosage list, copies of key medical records Longer buffer if legal and available, spares for glasses, batteries for medical devices
    Communication Phone charging cables, power bank, radio, written contact list A second radio, vehicle charging plan, household check-in schedule, low-signal backup devices
    Light and power Headlamps, flashlights, spare batteries, labeled charging pouch Portable power station, folding solar support, low-draw room lighting plan
    Warmth and hygiene Blankets, warm layers, gloves, soap, wipes, toilet basics Thermal blankets, room zoning plan, compact wash setup, duplicates for vehicle or office
    Documents and money IDs, insurance copies, emergency contacts, small cash reserve Organized waterproof copies, relocation pouch, spare chargers, translated copies if relevant

    Keep procurement calm and staged

    One of the safest lessons from official preparedness campaigns is that preparation should begin before the hardest news cycle, not after it. That does not mean buying everything immediately. It means staging purchases in an order that preserves household function.

    • Buy now: drinking-water storage, first-line medicines, backup lighting, phone charging, radio access, and a written contact list.
    • Buy next: filtration, sanitation supplies, compact warmth layers, longer-duration food, and a second communication or charging layer.
    • Buy later: better organization, cleaner storage, backup duplicates for vehicle or office kits, and comfort upgrades that make longer sheltering more manageable.

    Storage discipline is what makes the shelf real

    Preparedness fails when supplies scatter into too many rooms, expire without notice, or cannot be found by another adult in the home. Store water modules together, keep medical items clearly labeled, and separate core documents from daily clutter. If you have children, older adults, or a household member who may need help from a neighbor or relative, label the high-value items so someone else can step in quickly.

    A simple rotation calendar is better than a perfect spreadsheet nobody uses. Check food dates, water rotation, batteries, prescription refill timing, and key contact information at predictable intervals. If a system is not easy to check, it is not ready.
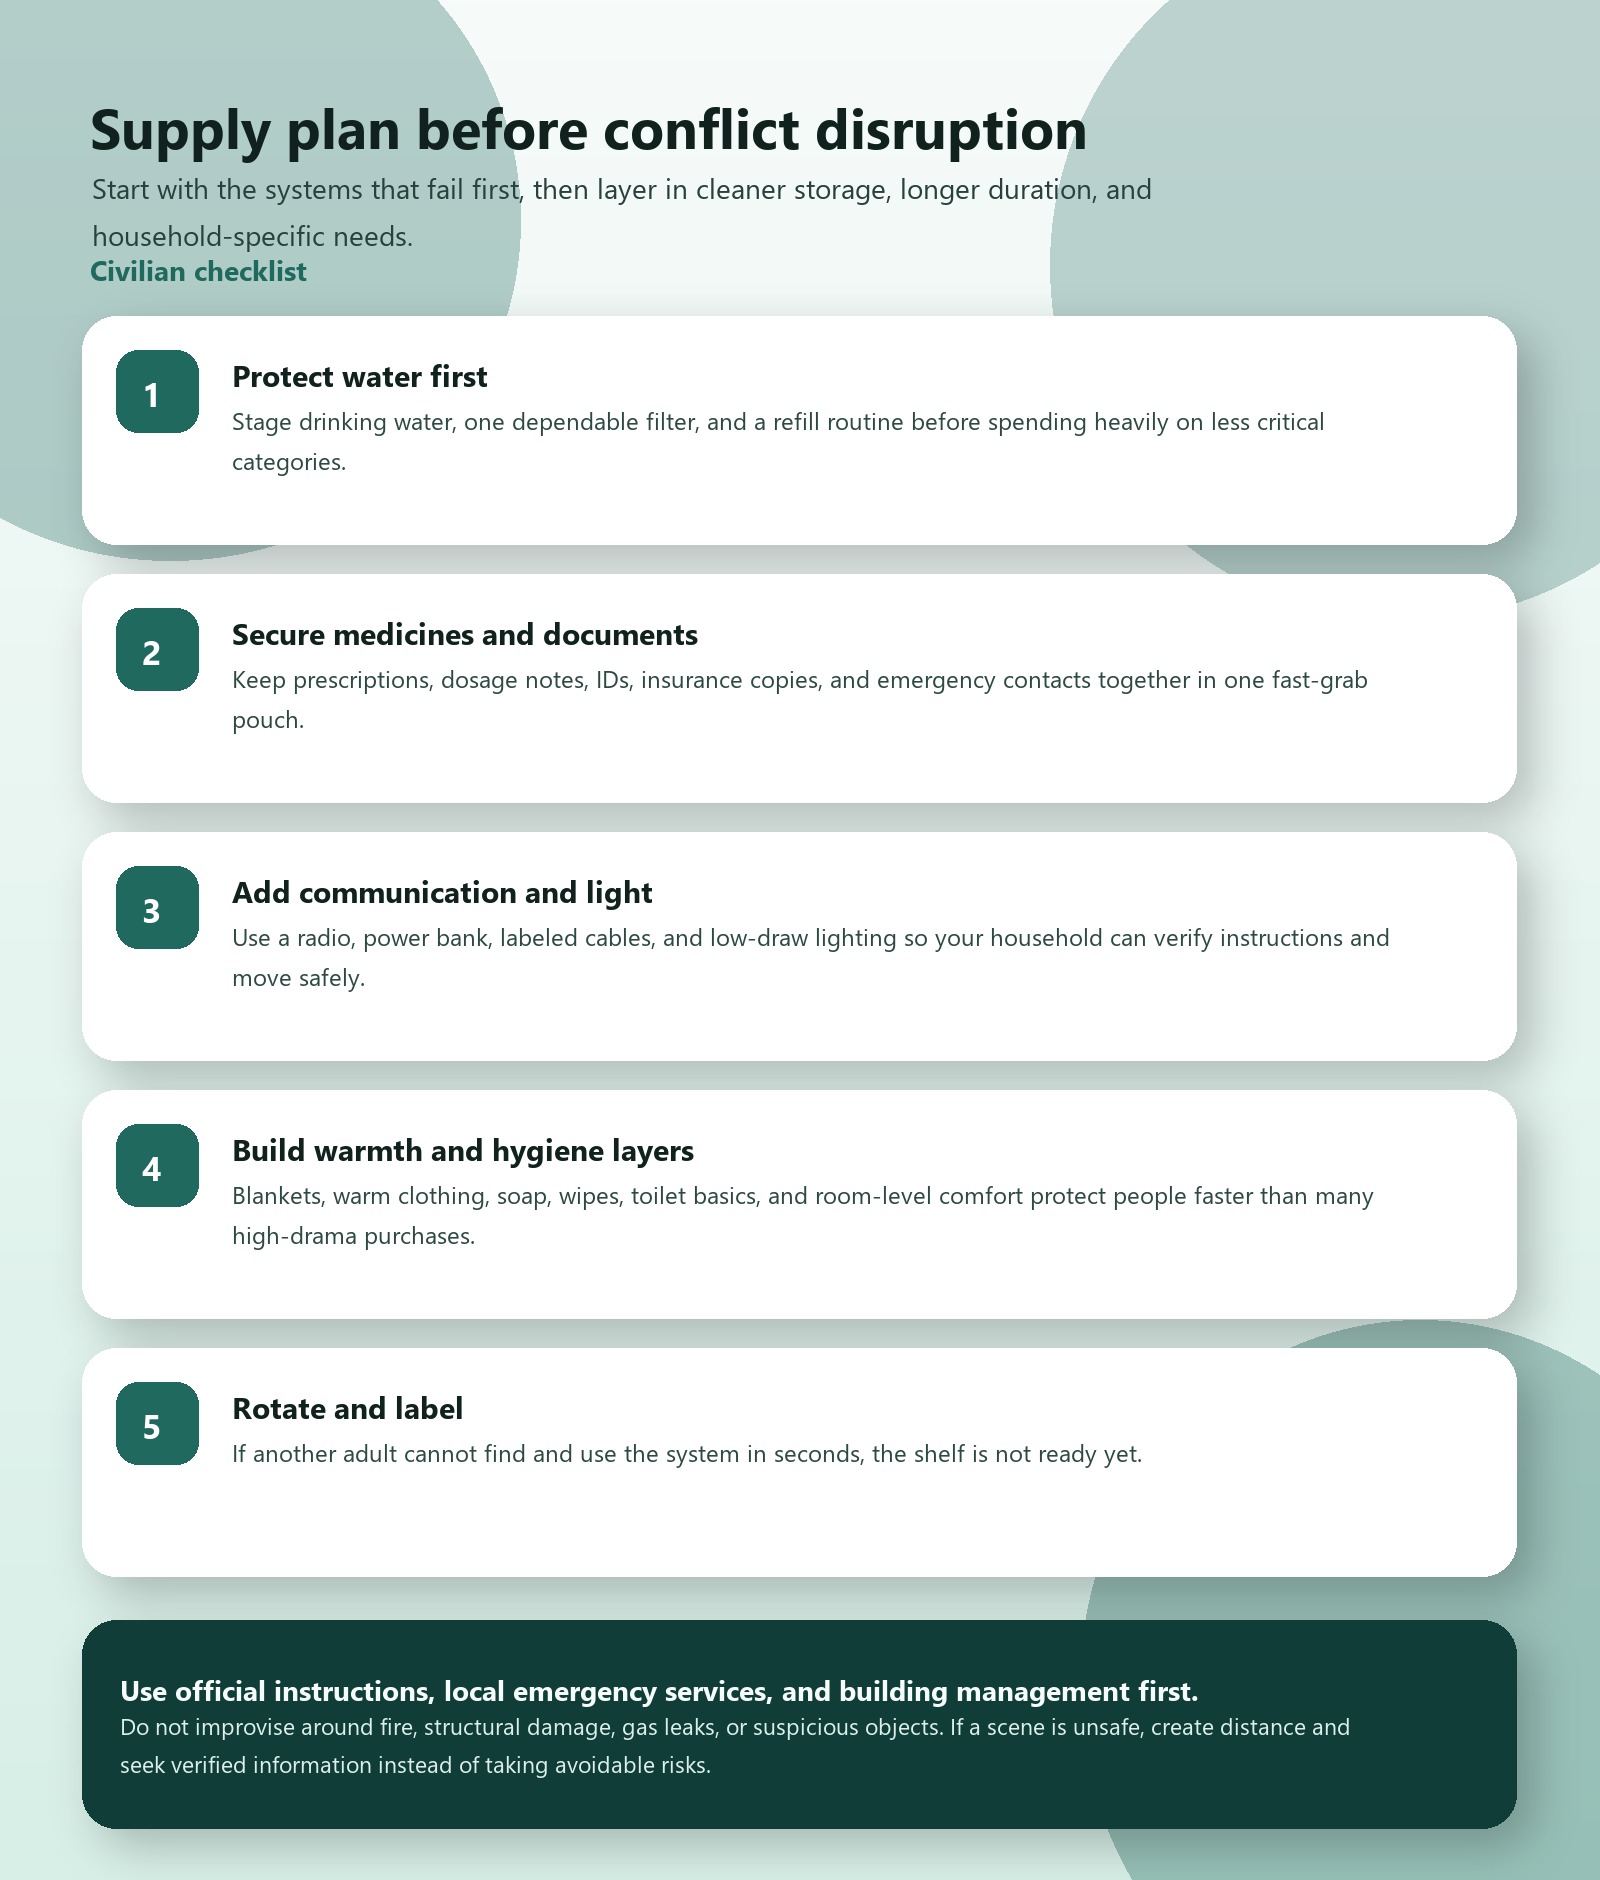
    civilian supply plan before war or regional conflict disrupts daily life checklist image

    Procurement should match realistic household roles

    A ground-floor family apartment, a suburban home with garage storage, a commuter who depends on a small vehicle, and a caregiver supporting an older relative will not buy the same things in the same order. Official guidance repeatedly points to planning by household role and location. That is why it helps to keep one home shelf, one smaller vehicle module, and one document-and-communication pouch that can move fast if needed.

    It also helps to think in jobs rather than objects. Do you have a clean way to hold drinking water? A way to verify alerts if cell service is weak? A way to see and move safely in the dark? A warm layer that can be issued quickly to a child or older adult? Those are better questions than simply counting gadgets.

    Useful support gear already on CampEssentials

    This site should not replace your planning process, but a few products can support the exact base-layer jobs described above.

    Common mistakes that make a household look prepared but stay fragile

    • Buying too much food before water, medicine, and communication basics are covered
    • Keeping supplies in multiple random containers instead of one clear staging system
    • Assuming a phone alone is a communication plan even when power or network quality may drop
    • Ignoring children, older adults, disability needs, or pet requirements until the last minute
    • Treating comfort items as if they can substitute for reliable lighting, warmth, hygiene, and clean water

    Final planning rule

    If a household can cover water, medicines, communication, light, warmth, and documents with low confusion, it has already solved a large share of what makes the early phase of conflict-driven disruption dangerous. Start there, keep it organized, and let every later purchase reinforce the same logic.
    Official reference links

  • How to Build a 72-Hour Readiness Kit Without Overpacking

    The biggest mistake in kit building is trying to solve every scenario with one giant bag. A better approach is to build a 72-hour kit around a small number of modules that stay easy to check, easy to carry, and easy to update.

    Start with five modules

    1. Water and purification
    2. Power and lighting
    3. Communication and charging
    4. Warmth and weather protection
    5. First aid and documentation

    Do not let duplicates take over the bag

    Too many overlapping tools add weight and confusion. One dependable flashlight, one radio, one charging kit, and one clearly organized medical pouch usually outperform a bag filled with random backups.

    Customize by location

    A commuter kit should be smaller than a vehicle kit. A family apartment kit can be larger than a travel kit. Use one standard list, then resize it based on where the bag lives and how often it can be checked.

    Use labels and check dates

    Water, batteries, medicines, and seasonal clothing all need attention. A kit only stays useful when someone can review it quickly and see what changed.

    Build the kit around real continuity

    Ask what your household actually loses during a disruption. Light? Water confidence? Phone charging? Warmth? Start there, then expand carefully. A practical kit is better than a dramatic one.

    Next step: visit 72-Hour Readiness Kits and connect the plan with Off-Grid Power, Water & Life Support, and Medical & Emergency Protection.

  • Self-Heating Emergency Blankets and Warmth Layers for Blackouts and Travel Delays

    Warmth planning is often treated like a minor accessory decision. In practice, blankets, dry layers, and compact shelter tools become central during roadside delays, overnight power outages, and outdoor interruptions. They are light, affordable, and useful across many environments.

    Blankets solve one part of the problem

    An emergency blanket helps retain heat, but it works best when combined with dry clothing, a wind barrier, and a simple shelter or seating plan. Warmth protection becomes more effective when it is viewed as a layered system instead of one miracle item.

    Where these layers belong

    • Vehicle kits for winter delays and roadside waiting
    • Apartment kits for blackouts and cold-weather utility loss
    • Travel bags for unexpected schedule changes
    • Outdoor bags for wet, windy, or overnight conditions

    Keep warmth gear dry and visible

    Store thermal items in a bright, labeled pouch so they can be found quickly. Pair them with gloves, socks, and a head covering if the climate makes sense. Small additions often improve comfort more than a larger blanket alone.

    Warmth belongs in both medical and shelter planning

    Thermal protection supports first response and also buys time when shelter is limited. That is why it should connect with Medical & Emergency Protection and with your wider shelter and kit strategy.

    Next step: add a warmth module to your 72-hour readiness kit.

  • Modular First Aid Kits for Home, Vehicle, and Field Use

    A single overloaded medical pouch is difficult to use when time matters. A modular first aid kit is easier to maintain, easier to restock, and easier to move between the house, the car, and an outdoor bag. The goal is not to make the kit look bigger. The goal is to make it easier to use.

    Break the kit into clear modules

    • Immediate care: gloves, dressings, tape, wipes, and shears
    • Medication support: clearly labeled personal items and dosage notes
    • Thermal support: self-heating emergency blankets, hats, and dry storage
    • Reference layer: emergency contacts, allergies, and inventory notes

    Why thermal protection belongs in the same plan

    Warmth loss, wet conditions, and long waiting periods matter in a surprising number of real situations. That is why thermal blankets and dry layers should be planned together with the medical pouch instead of stored separately in random bags.

    Make the kit location-specific

    A home kit can be larger. A vehicle kit should be more durable and easier to access. A field kit should be lighter and simpler. The best first aid kit is one that matches the environment and gets checked regularly.

    Label everything

    Use clear labels and small pouches so another person can help even if they did not pack the bag. Good organization improves speed and reduces mistakes without adding more equipment.

    Next step: visit Medical & Emergency Protection and connect it with your 72-hour kit.

  • Emergency Radio vs Satellite Messenger: What Actually Matters in the Field

    People often compare emergency radios and satellite messengers as if one should replace the other. In reality they do different jobs. One is mainly about receiving updates and monitoring conditions. The other matters more when you need to send information from areas where normal coverage is weak or unavailable.

    What an emergency radio does best

    Radios are useful because they provide broad alerts, weather information, and passive monitoring without needing a cellular connection. They also tend to be easy to share among family members because the interface is simple and familiar.

    What a satellite messenger does best

    A satellite device becomes more relevant when the priority is outbound communication during remote travel or low-coverage conditions. It is not always necessary for an apartment outage or a short local disruption, but it can be valuable for field travel, overland use, and areas with limited infrastructure.

    Power planning changes the equation

    The best communication device is still a poor choice if your charging plan is weak. Radios with battery flexibility, hand-crank backup, or USB simplicity often outperform more advanced tools simply because they stay powered. Whatever you choose, pair it with a clean charging routine from Off-Grid Power.

    Ask four questions before buying

    • Do I mainly need alerts, or do I need outbound communication?
    • Will this live in an apartment kit, vehicle kit, or remote travel kit?
    • How will I recharge it for three days?
    • Can everyone in the household use it quickly?

    Layered communication is usually the smartest approach

    For most people, a layered setup works best: phone first, radio second, and more specialized communication gear for remote conditions. That keeps cost under control while still improving resilience.

    Next step: visit Signal & Field Communication and add the right device to your 72-hour kit.

  • Emergency Water Filtration and Storage Checklist for Families and Travel Kits

    People treat water preparedness like a binary question: “Do I have water stored?” Yes or no. But actual water emergencies introduce variables that a stack of gallon jugs in the garage does not solve. Contamination, container integrity, filter lifespan, treatment method compatibility, and consumption rates all interact in ways that catch even experienced preppers off guard.

    This checklist was built from EPA guidance documents, FEMA’s water sanitation guidelines, and field notes from families who rode out multi-day water disruptions during the 2024 hurricane season and the East Palestine, Ohio chemical spill. It covers storage, filtration, purification, and the overlooked gaps between them.

    Part 1: Storage Fundamentals

    The standard recommendation is one gallon per person per day. That number, published by FEMA and repeated across every preparedness site, covers drinking and basic sanitation. It does not cover cooking (add 0.5 gallons if you plan to prepare dehydrated food), cleaning wounds (another 0.5 gallons minimum for a family with children), or hygiene beyond the bare minimum.

    A realistic target for a family of four over 72 hours is 15-20 gallons, not 12.

    Container Selection Matters More Than People Think

    Not all water containers are created equal, and the wrong choice causes real problems:

    • Commercially sealed water pouches (5-year shelf life): The gold standard for long-term storage. Individual pouches prevent cross-contamination and survive freezing better than rigid bottles. Downside: higher cost per gallon, more packaging waste.
    • BPA-free polyethylene jugs (blue tint, food-grade): Good for 6-12 month rotation cycles. The blue tint blocks light and slows algae growth. Must be stored away from concrete floors (chemicals leach through concrete into plastic over time).
    • Repurposed beverage containers: Acceptable only if they originally held water or clear beverages. Former milk jugs are unsuitable. Residual milk proteins create bacterial growth even after thorough washing. Former juice bottles retain sugar residue that feeds microorganisms.

    Rotation schedule: Commercially sealed pouches, replace every 5 years. Home-filled containers, replace every 6 months. Mark each container with the fill date using a permanent marker.

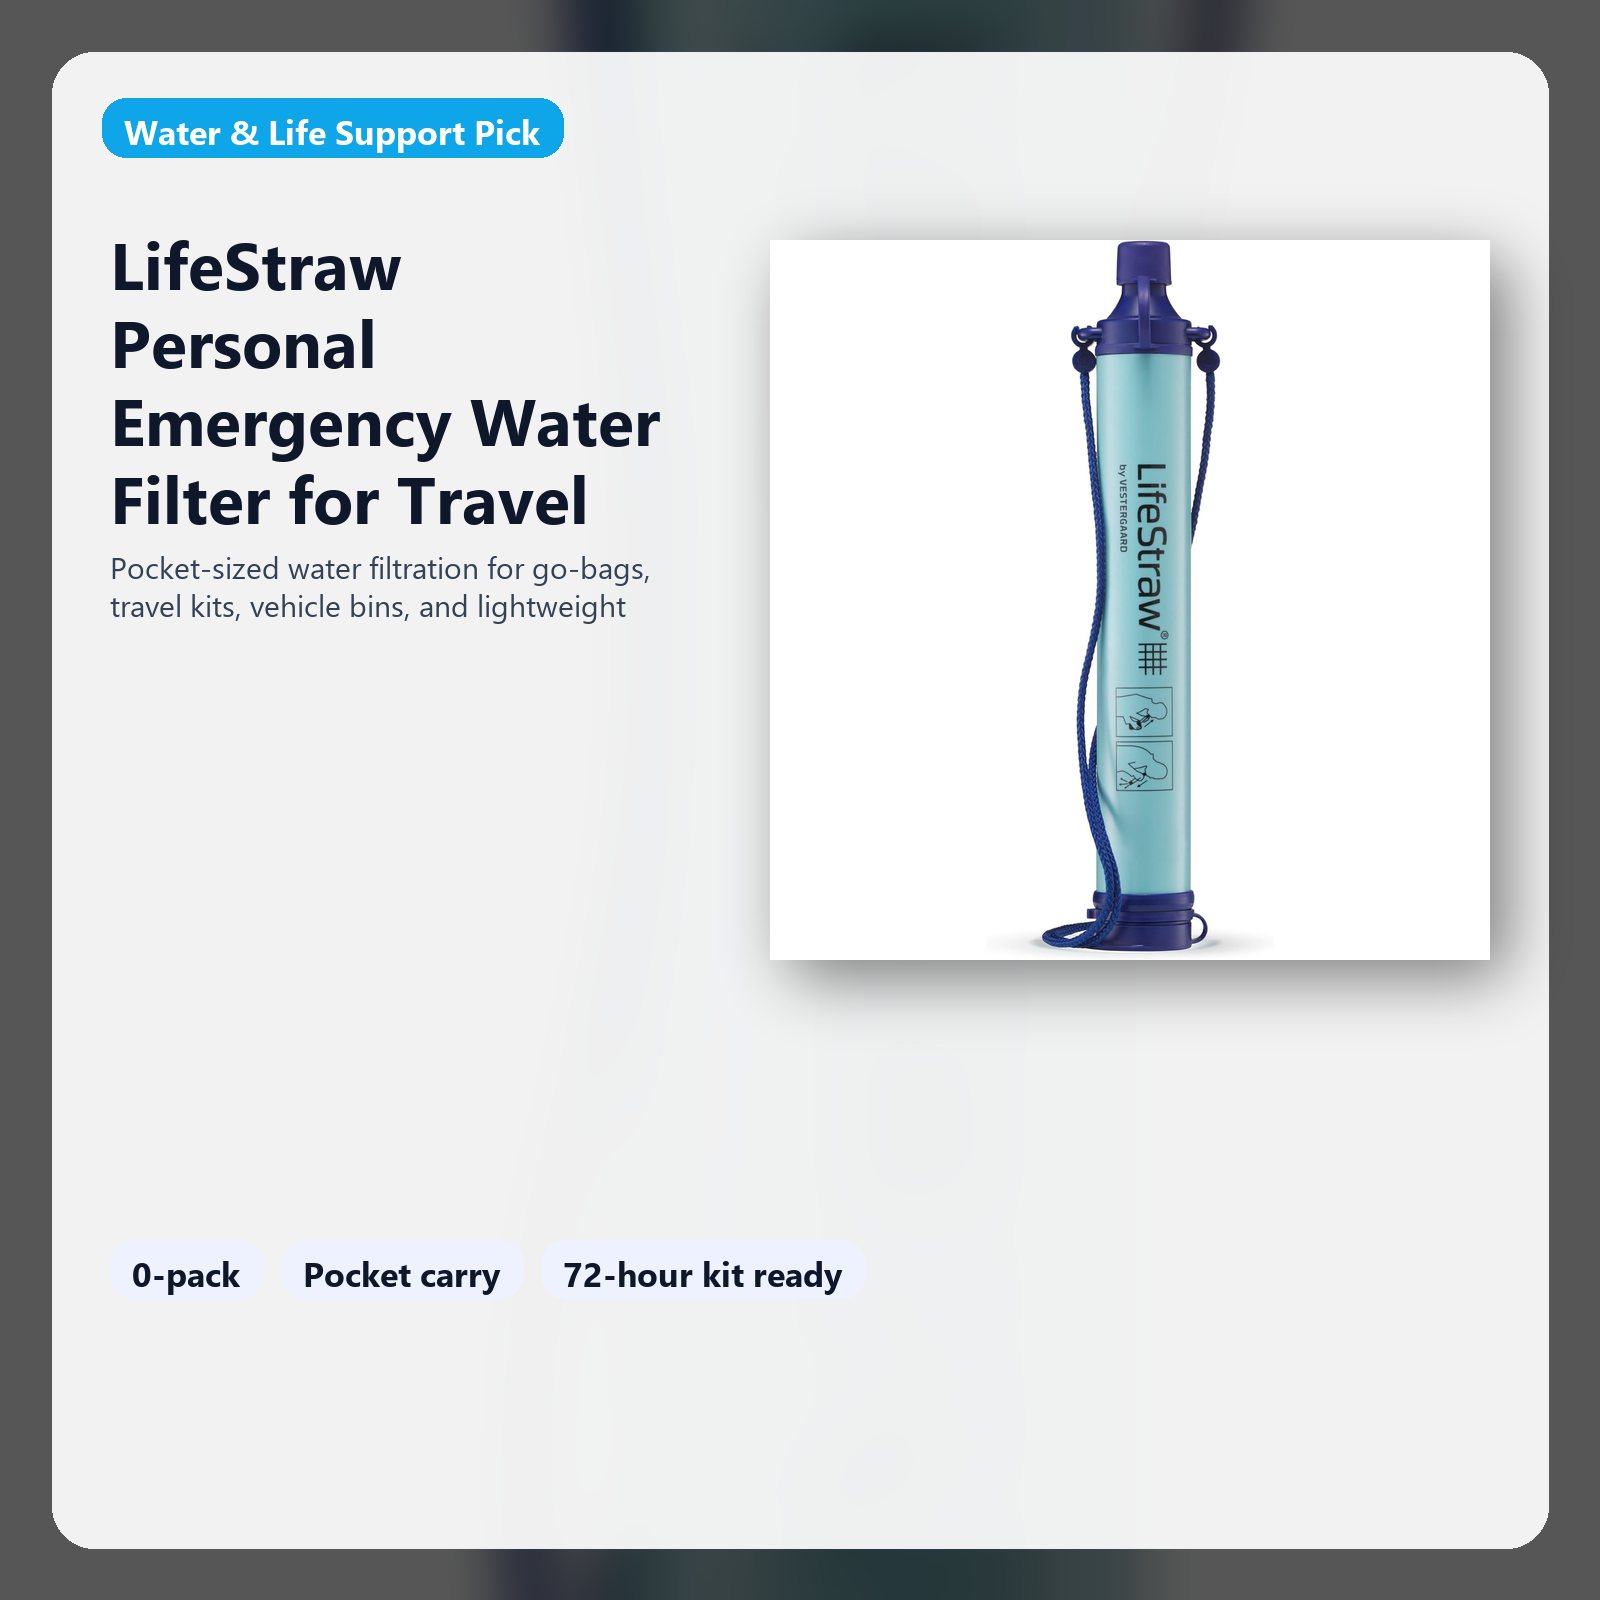
    LifeStraw personal emergency water filter for travel and 72-hour preparedness kits
    Personal water filters like the LifeStraw remove 99.99% of bacteria and parasites, serving as a critical backup when stored water runs out.

    Part 2: Filtration vs Purification (They Are Not the Same Thing)

    This is the single biggest source of confusion in water preparedness. People use “filter” and “purify” interchangeably, but they address completely different threats:

    Method Removes Does NOT Remove Best For
    Mechanical filter (0.2 micron) Bacteria, protozoa, sediment, some heavy metals Viruses, dissolved chemicals, salt Stream/lake water, municipal water after pipe breaks
    Chemical purification (chlorine/iodine tablets) Bacteria, viruses, some protozoa Cryptosporidium, sediment, chemicals, taste Clear water of unknown microbial status
    UV treatment (SteriPEN-type devices) Bacteria, viruses, protozoa Sediment, chemicals, turbid water (UV cannot penetrate) Clear water, international travel
    Boiling (1 min at rolling boil, 3 min above 6,500 ft) All biological pathogens Chemicals, heavy metals, sediment Known clean water source with suspected biological contamination

    The practical takeaway: no single method covers all threats. The most resilient approach is a two-stage system: mechanical filtration first (removes sediment and bacteria), followed by chemical treatment or UV (eliminates viruses that pass through the filter). This is how humanitarian organizations configure field water systems, and it is how your home preparedness kit should work.

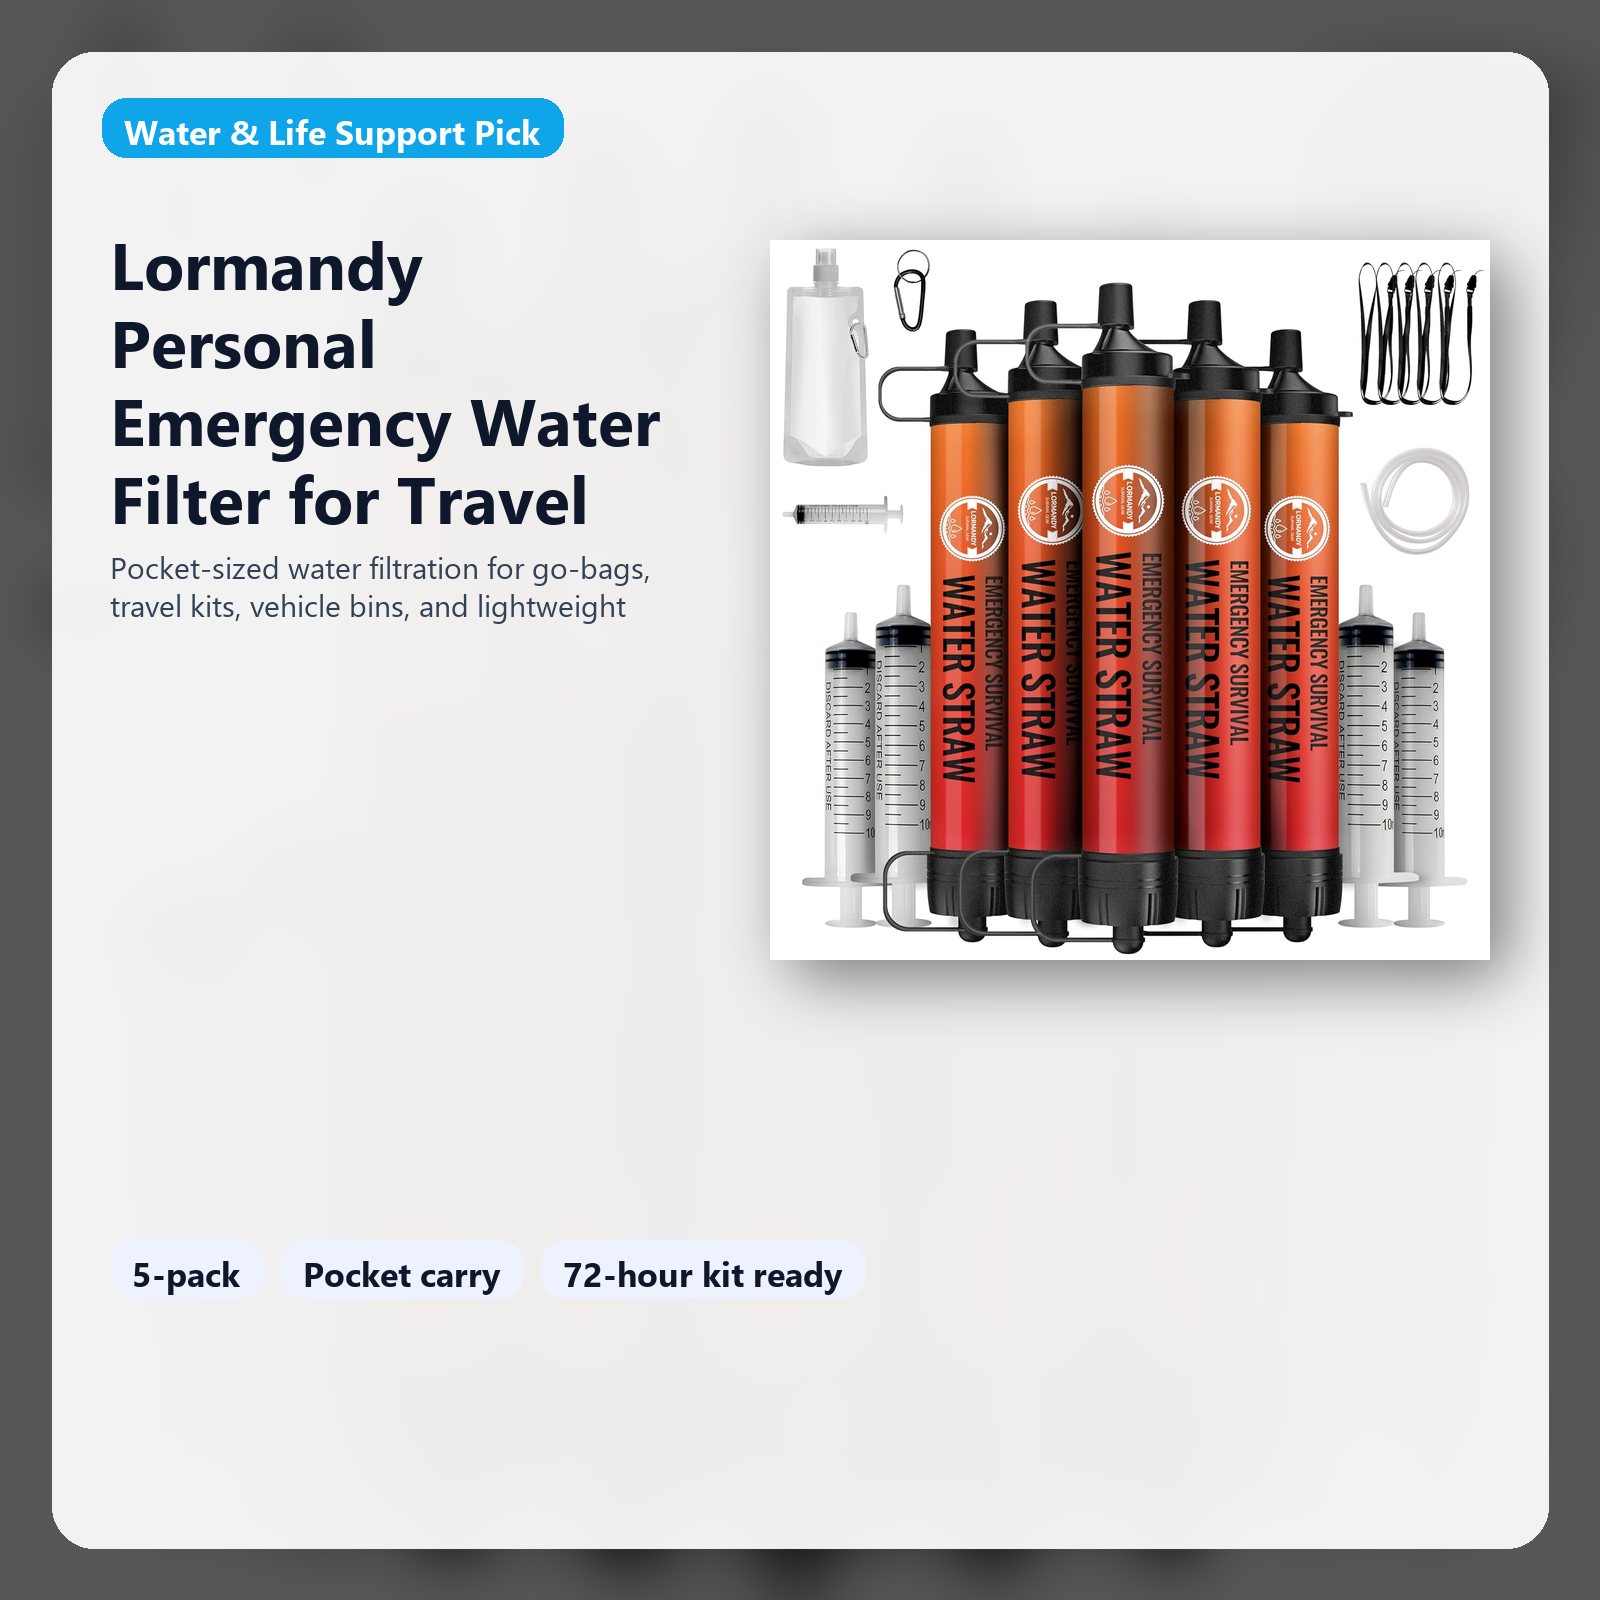
    Personal emergency water filter for portable water treatment and emergency preparedness
    Gravity-fed and squeeze filters handle the mechanical filtration stage, removing bacteria and protozoa down to 0.1-0.2 microns.

    Part 3: The Complete Checklist

    Tier 1 — Immediate Supply (0-72 hours)

    • 15-20 gallons stored water (sealed pouches or food-grade containers), clearly dated
    • One personal water filter per adult family member (1,000+ gallon lifespan)
    • 50 water purification tablets (treats 50 liters) as chemical backup
    • Collapsible water container (2.5-5 gallon) for carrying water from distribution points

    Tier 2 — Extended Disruption (3-14 days)

    • Gravity-fed filter system (family-sized, processes 1-3 gallons per hour without pumping)
    • Additional 20+ gallons stored water or access to a natural water source within walking distance
    • Bleach (plain, unscented, 5-6% sodium hypochlorite): 8 drops per gallon of clear water, 16 drops for cloudy water, wait 30 minutes
    • Clear plastic bottles for SODIS (solar disinfection): fill, place in direct sunlight for 6+ hours on a hot surface

    Tier 3 — Infrastructure Failure (14+ days)

    • Rainwater collection system (tarp + barrel + first-flush diverter)
    • Spare filter elements for your gravity system (most need replacement every 3,000-6,000 gallons)
    • Water testing strips (bacteria + pH + chlorine levels) to verify treatment effectiveness
    • Pool shock (calcium hypochlorite, 68%+): shelf-stable alternative to liquid bleach for long-term storage

    Part 4: Common Mistakes That Compromise Water Safety

    1. Storing water in direct sunlight: UV accelerates plastic degradation and promotes algae growth in translucent containers. Store in a cool, dark location.
    2. Assuming tap water is safe after a boil notice is lifted: Flushing protocols matter. Run each faucet for 5 minutes after service is restored. Run hot water for 15 minutes to flush the water heater. Discard ice made during the disruption.
    3. Ignoring the hot water heater: A standard 40-gallon water heater is an emergency water source most people forget. Turn off the gas or electric supply, let it cool, then drain from the valve at the bottom. The water is potable if the heater was functioning normally before the outage.
    4. Using a filter past its rated lifespan: A 1,000-gallon filter that has processed 1,001 gallons is worse than no filter, because it creates false confidence. Track your usage.
    5. Failing to pre-filter turbid water: Muddy or silty water clogs mechanical filters rapidly and prevents chemical treatment from working effectively. Strain through a clean cloth or coffee filter first to remove visible sediment, then apply your primary treatment method.

    The Bottom Line

    Water preparedness is a system, not a stockpile. Stored water covers the first 72 hours. Filtration extends your supply using available water sources. Purification addresses threats that filters miss. And knowledge of your home’s hidden water sources (water heater, toilet tanks with clean water, rainwater) provides options when everything else runs out.

    Build your water system in tiers, test your equipment annually, and rotate your stored supply on a fixed schedule. The families who handled real water disruptions most effectively were not the ones with the most gallons stashed away. They were the ones who understood what each layer of their system did and what it could not do.

    Browse our water filtration and storage products to build your own multi-layer water preparedness system, or return to the main shop for complete emergency readiness equipment.

  • Off-Grid Power Backup Basics for Blackouts, Vehicles, and Remote Trips

    Most people think emergency power planning starts with buying the largest battery they can afford. In practice, it starts with deciding what absolutely needs to stay on. Phones, radios, flashlights, and low-draw lighting usually matter more than trying to run half a house from one expensive device.

    Start with a power priority list

    Before comparing watt-hours and solar inputs, write down the devices you actually need. A small battery bank can keep a phone, flashlight, and radio useful for far longer than people expect. A portable power station becomes more important when you need longer runtimes, more ports, or better recharge control.

    Portable power station vs battery bank

    A battery bank is light, cheap, and easy to rotate into daily life. A portable power station is heavier, but it supports more gear, clearer monitoring, and a better bridge between wall charging, car charging, and solar charging. If you are building a car kit or blackout kit, the station often becomes the center of the system. For commuting, travel, and small-bag use, battery banks still win.

    Why folding solar should be paired with discipline

    Solar panels are helpful when they are matched to a realistic routine. That means understanding sun availability, connector limits, and what devices get charged first. A modest panel can do a lot when paired with radios, lights, and phones. It does far less when used with a poor cable setup or oversized expectations.

    Reduce waste before you add capacity

    • Use low-draw lanterns and headlamps instead of bright flood lighting.
    • Keep cables labeled so charging windows are not wasted.
    • Charge radios, phones, and lights before larger comfort devices.
    • Test your setup in normal life so it is familiar during a real outage.

    The best off-grid power setup is the one you maintain

    The most reliable emergency power system is usually a simple one: one battery bank, one larger station, one folding solar panel, and a clean connector kit. It is easier to check, easier to recharge, and far easier to pack into a vehicle or apartment closet.

    Next step: visit Off-Grid Power and pair your charging plan with Signal & Field Communication.

  • Apartment Blackout Preparedness After 6 PM: A 72-Hour Plan for Water, Safe Food, Warmth, and Communication

    Blackout advice often assumes a suburban house, a garage full of supplies, and easy access to a generator. Apartment life changes the math. You may depend on elevators, have limited storage, live with shared hallways and limited ventilation, and have no safe place to run fuel equipment even if you owned it. That means apartment blackout preparedness needs its own plan, especially for outages that begin after work when batteries are half-used, dinner is unfinished, and the building is already shifting into night mode.

    The good news is that apartment resilience does not require dramatic stockpiling. Official guidance from Ready.gov, the Red Cross, CDC, and FoodSafety.gov points to the same basic priorities: safe water, temperature control, communication, medication continuity, and smart food decisions. The challenge is making those priorities work inside a smaller footprint without buying a lot of gear that never gets maintained.

    This guide is built for that reality. It focuses on the first 72 hours after an evening outage, when most mistakes are not heroic mistakes. They are ordinary ones: opening the refrigerator too often, draining all your power banks on bright lights, underestimating how quickly cold changes the mood of a room, or using unsafe heat and generator methods indoors. If you are building your setup from the CampEssentials catalog, the point is not to own everything. It is to protect the systems that fail first.

    The first 15 minutes: stabilize before you improvise

    When the lights go out after 6 PM, treat the first minutes as a stabilization window. Confirm whether the outage is limited to your unit or building-wide. Check on children, older adults, and anyone who depends on powered medical equipment. Put shoes on if the home is dark enough that broken glass or dropped objects could become a risk. Then switch from bright, battery-draining solutions to controlled light. One headlamp or lantern in the main room is more useful than three phone flashlights pointed in different directions.

    At this stage, avoid opening the fridge “just to check.” Food safety guidance is much kinder to a closed refrigerator than to a curious household. Also avoid making assumptions about outage length. A 20-minute outage and a 20-hour outage start the same way. The difference is how carefully you use stored energy and how quickly you move the household into a lower-power rhythm.

    Water is the first system to define clearly

    Ready.gov’s baseline is simple: about one gallon of water per person per day for drinking and sanitation. In apartment life, that number is more useful as a planning floor than as a rigid daily promise. Real demand changes with weather, medication use, pets, pregnancy, nursing, illness, and how much cleanup the outage creates. The mistake is not keeping the exact wrong amount. The mistake is keeping no defined amount at all.

    A practical apartment strategy is to build water in layers:

    • Immediate layer: a small amount of ready-to-grab drinking water that does not require moving boxes or opening a storage bin.
    • Reserve layer: additional sealed water stored in a cool closet or under-bed zone.
    • Treatment layer: filters or purification tools for longer disruptions or uncertain water conditions.

    If space is tight, smaller containers often outperform one giant container because they are easier to rotate, easier to carry, and less likely to become dead storage. What matters is not whether the water lives in dramatic five-gallon form. What matters is whether it is accessible, clean, rotated, and accounted for.

    Food safety during an outage is mostly about restraint

    People lose food during outages less because of one dramatic failure than because of repeated small decisions. FoodSafety.gov and CDC guidance give a reliable rule set: keep the refrigerator door closed as much as possible; a closed refrigerator generally protects food for about four hours, while a full freezer can hold temperature for much longer than a half-full one. After that, temperature history matters more than guesswork.

    Build your apartment food plan accordingly:

    • Use shelf-stable meals and snacks during the first hours instead of burning fridge temperature on convenience decisions.
    • Know which refrigerated medicines or foods truly need protection and prioritize them first.
    • Keep a thermometer in the refrigerator or freezer if possible so you are not relying on touch or optimism.
    • Do not taste food to test safety after an extended outage.

    This is where organized 72-hour food kits help. They reduce indecision and stop people from repeatedly opening temperature-sensitive storage because they “just need something quick.”

    Warmth is about layering, not about unsafe improvisation

    Cold apartments get miserable faster than many households expect, especially in buildings with drafts, poor window seals, or heating systems that depend entirely on electric controls. The answer is not to improvise with indoor grills, camp stoves, or fuel-burning heaters that were never meant for sealed spaces. CDC generator and carbon monoxide guidance is blunt for a reason: combustion indoors can turn a power problem into a poisoning emergency.

    A safer apartment warmth plan uses layers:

    1. Body layers: dry base layers, socks, hats, gloves if needed.
    2. Fast warmth layer: blankets, emergency bivy sacks, and hand warmers for immediate comfort.
    3. Room discipline: choose one core room, close doors to unused rooms, and reduce drafts rather than heating the whole apartment emotionally.
    4. Sleep system: prepare bedding and warmth support before everyone is already tired and cold.

    Apartment households often underestimate how much morale improves once one room becomes predictably livable. Warmth planning is not just physical. It keeps decision-making cleaner when the outage runs into midnight and the household is no longer operating on fresh patience.

    Communication and light need an energy budget

    One of the fastest ways to weaken an otherwise good blackout setup is to treat every battery like it is available for every problem at once. During an evening outage, households burn energy on bright lights, constant scrolling, and speculative charging before they know how long the event will last. That is how a manageable first night turns into a weak second morning.

    A stronger approach is to assign energy by role:

    • Critical communication: one phone that stays above a defined battery floor.
    • Area lighting: lanterns or low-draw lights instead of multiple phone flashlights.
    • Information layer: radio access or trusted local alert sources.
    • Recharge layer: power banks or stations used on a schedule, not reactively.

    Texting often works more reliably than calling during widespread disruptions. Keep one person responsible for outside updates so the household does not waste power duplicating the same checks on five devices. If you need equipment that supports that energy budget, start with Off-Grid Power and Signal and Field Communication rather than buying random backups that never get tested together.

    Medication, hygiene, and sanitation deserve their own module

    Preparedness lists often mention medicine as a line item, but apartment outages expose how many routines quietly depend on light, timing, refrigeration, or powered devices. Build one module that includes essential medication, copies of prescriptions, a written dose list, spare glasses, basic first aid, sanitation wipes, trash bags, toilet paper, and soap or no-rinse hygiene options. The point is to remove searching, not to create a mini-hospital.

    Households with babies, older adults, or pets should customize this module early. Apartment readiness fails fastest when one dependent member’s needs were assumed instead of planned.

    A realistic 72-hour apartment layout

    You do not need a bunker layout. You need predictable placement. One shelf or bin each for water, shelf-stable food, power, warmth, and sanitation is enough to create order. In small apartments, vertical shelving, under-bed bins, and clearly labeled closet zones work better than scattered emergency purchases across three rooms.

    A simple map looks like this:

    • Entry or hall closet: lights, power banks, shoes, grab items, rain layers.
    • Bedroom or linen closet: blankets, bivy sacks, hand warmers, spare bedding.
    • Kitchen-adjacent shelf: water reserve, shelf-stable meals, manual opener, sanitation basics.
    • Small document pouch: IDs, prescriptions, emergency contacts, building information.

    This layout matters because people make better decisions when the system is visible before stress begins. Preparedness is not only what you own. It is how quickly you can locate it under poor conditions.

    When the power comes back

    Recovery is part of preparedness. Re-charge devices in a deliberate order. Check food temperature honestly. Refill water used during the outage before you tell yourself you will do it later. If the building experienced elevators down, water interruptions, or significant corridor traffic, use the return of power as a moment to strengthen the weak point you noticed. Every outage is feedback.

    Final takeaway

    Apartment blackout readiness is not about copying a suburban checklist into a smaller room. It is about translating the same official priorities into a tighter, more disciplined system. Water, safe food, warmth, communication, and medical continuity matter everywhere. Apartments simply demand that those categories be lighter, quieter, more organized, and more space-aware.

    If you build with that logic, you do not need an oversized emergency fantasy. You need a clean 72-hour system that works when the lights go out after dinner and the building starts feeling uncertain. For gear that supports that approach, start from 72-Hour Readiness Kits, Water and Life Support, and Thermal Protection.

    Selected references and further reading

  • Building a 30-Day Emergency Preparedness Timeline

    Emergency preparedness is not a single weekend project. Building a reliable safety net for your household takes roughly 30 days of focused, incremental effort. This timeline breaks each week into actionable milestones so you never feel overwhelmed.

    Week 1: Assess Your Risks and Inventory

    Start by identifying the natural disasters and infrastructure failures most likely in your region: hurricanes, earthquakes, winter storms, prolonged power outages, or wildfires. Walk through every room and list supplies you already own: flashlights, batteries, first aid items, stored water, and non-perishable food. Photograph everything and note expiration dates. This baseline audit tells you exactly what gaps to fill over the next three weeks.

    Order a NOAA weather radio during this week. It takes a few days to arrive, and it will become the backbone of your alert system. Also check your smoke detectors and carbon monoxide alarms; replace batteries or entire units if they are older than ten years.

    Week 2: Water, Food, and Power

    The general guideline is one gallon of water per person per day for at least 72 hours, though a two-week supply is far safer. If storage space is limited, invest in a gravity-fed water filtration system that can process lake, rain, or tap water when municipal supply fails.

    Build a food cache of shelf-stable items: freeze-dried meals, canned protein, energy bars, electrolyte packets, and comfort items like instant coffee. Rotate stock on a six-month cycle. For power, a portable power station rated above 500 Wh will keep phones, radios, a CPAP machine, and LED lights running through a 48-hour blackout.

    Week 3: Medical, Communication, and Documents

    Assemble or upgrade your IFAK (Individual First Aid Kit) with tourniquets, hemostatic gauze, chest seals, and a CPR mask. Take a free online Stop the Bleed course so the gear is not wasted on untrained hands. Photocopy insurance policies, IDs, medical records, and vaccination cards; store them in a waterproof pouch inside your go-bag.

    Program emergency contacts into every family member’s phone. Designate two meeting points: one near your home and one outside your city. Test your two-way radios or GMRS handhelds to confirm range in your neighborhood.

    Week 4: Drill, Refine, and Maintain

    Run a full-family blackout drill: cut the main breaker for six hours on a Saturday, rely only on your kit, and note every friction point. Did the headlamps work? Was there enough water? Could you cook without the stove? Document lessons learned and address each gap.

    Finally, create a maintenance calendar: check batteries quarterly, rotate food every six months, update documents annually. A 30-day build only works if it becomes a 365-day habit.

    Explore Emergency Preparedness Equipment

    Building real-world readiness starts with the right gear. Browse our curated collections:

  • How to Recover Quickly After a Natural Disaster

    The first 72 hours after a natural disaster determine how fast a household returns to normalcy. Whether you are dealing with hurricane damage, earthquake aftershocks, or a prolonged grid failure, a structured recovery plan reduces chaos and protects your family’s health.

    Immediate Safety: The First Six Hours

    Before touching debris or entering a damaged structure, shut off gas at the meter if you smell a leak, and kill power at the breaker panel. Wear sturdy boots, work gloves, and an N95 mask to avoid dust, mold spores, and broken glass. Check every family member for injuries; use your IFAK trauma kit if anyone is bleeding or in shock.

    If the building is structurally compromised, evacuate to your pre-designated meeting point. Never re-enter a home with visible cracks in the foundation or a sagging roof. Contact your insurance company from a charged cell phone or satellite communicator and file an initial claim number while details are fresh.

    Stabilizing in 24-48 Hours

    Deploy your portable power station to keep phones, medical devices, and lights operational. Ration stored water at half a gallon per person per day if resupply is uncertain. Boil or filter any water from unknown sources using a gravity filter or purification tablets. Monitor NOAA radio frequencies for official updates on shelter locations, road closures, and boil-water advisories.

    Document property damage with timestamped photos and video before moving or cleaning anything. This evidence is critical for insurance adjusters and FEMA assistance applications.

    The First Week: Restoration and Aid

    Register with FEMA’s disaster assistance program online or at a local Disaster Recovery Center. Contact the Red Cross for emergency shelter if your home is uninhabitable. Begin debris removal only after the local authority gives clearance; prioritize mold prevention by ventilating wet rooms and running dehumidifiers if power is restored.

    Restock your emergency kit while lessons are fresh. Replace consumed food, depleted batteries, and used medical supplies within two weeks so you are ready for any aftershock event or secondary emergency.

    Long-Term Recovery Checklist

    • File insurance claims within 30 days of the event
    • Get a structural inspection before full re-occupation
    • Upgrade your power backup if the outage exceeded your capacity
    • Attend community recovery meetings for shared resources
    • Update your emergency plan based on lessons learned

    Explore Emergency Preparedness Equipment

    Building real-world readiness starts with the right gear. Browse our curated collections:

  • The Evolution of Emergency Alert Systems in 2026

    Emergency alert technology has changed radically over the past decade. From the simple tone-based EAS broadcasts of the 2010s to today’s geofenced Wireless Emergency Alerts on every smartphone, the infrastructure designed to save lives keeps improving. Understanding how these systems work helps you respond faster when seconds count.

    From Sirens to Smartphones

    Outdoor warning sirens, first deployed in the Cold War era, remain active in tornado-prone regions but reach only those within earshot. The real leap came with the Wireless Emergency Alert (WEA) system, mandated by the WARN Act of 2006 and upgraded multiple times since. In 2026, WEA messages can include embedded maps, shelter locations, and Spanish-language text, a major improvement over the original 90-character limit.

    NOAA Weather Radio remains the gold standard for receiving watches, warnings, and advisories without cell service. A Specific Area Message Encoding (SAME) chip inside modern emergency radios filters alerts to your exact county, eliminating irrelevant noise from distant regions.

    Satellite and Mesh Networks

    When cell towers fail, satellite communicators like the Garmin inReach and Apple’s Emergency SOS via satellite provide a lifeline. These devices use low-earth-orbit constellations to send GPS coordinates and short text messages from wilderness or disaster zones with zero infrastructure. GMRS two-way radios fill the gap for neighborhood-level communication, with repeater networks extending range to 20+ miles in flat terrain.

    How to Build a Redundant Alert Setup

    No single system is foolproof. Build redundancy:

    1. Primary: Smartphone with WEA enabled and a weather app with push notifications
    2. Secondary: NOAA weather radio with battery backup and SAME programming
    3. Tertiary: GMRS or ham radio for local communication when grids fail
    4. Extreme: Satellite communicator for remote or prolonged infrastructure loss

    Test each layer quarterly. Replace radio batteries every six months. Store at least one alert device in your go-bag so it travels with you during evacuation.

    Explore Emergency Preparedness Equipment

    Building real-world readiness starts with the right gear. Browse our curated collections:

  • Why Sleep Deprivation Hits Hard During Emergencies

    In the first 48 hours of a prolonged blackout, hurricane aftermath, or evacuation, most adults sleep fewer than four hours per night. The consequences compound rapidly: impaired judgment, slower reaction times, weakened immune response, and increased emotional volatility. Understanding the physiology behind sleep loss helps you manage it when rest is scarce.

    What Happens to Your Body

    After 24 hours without sleep, cognitive performance drops to the equivalent of a 0.10 blood alcohol level, above the legal driving limit. Cortisol spikes, glucose regulation falters, and the prefrontal cortex (responsible for decision-making) becomes sluggish. In a survival scenario, this means you are more likely to misread a map, misjudge a hazard, or make a poor rationing decision.

    Practical Sleep Strategies for Emergencies

    You cannot eliminate sleep loss during a crisis, but you can minimize its damage:

    • Rotate watch shifts: If multiple adults are present, assign two-hour watch shifts so everyone gets at least four consecutive hours of sleep per cycle.
    • Block light and noise: A sleep mask and foam earplugs weigh nothing and dramatically improve rest quality in shelters, vehicles, or tents.
    • Temperature control: An emergency thermal blanket reflects 90% of body heat. In summer, a battery-powered fan from your power station prevents heat-induced insomnia.
    • Caffeine timing: Limit coffee or caffeine tablets to the first half of your waking period. Consuming caffeine within six hours of a planned sleep window makes rest nearly impossible.

    Kit Additions for Better Rest

    Add these lightweight items to your emergency kit: a compact inflatable pillow, a sleep mask, silicone earplugs, and melatonin tablets (3 mg). If you rely on a CPAP machine, ensure your portable power station can sustain it for 8+ hours. Most CPAP units draw 30-60 watts, meaning a 500 Wh station provides a full night of therapy.

    Explore Emergency Preparedness Equipment

    Building real-world readiness starts with the right gear. Browse our curated collections: